

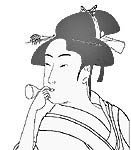
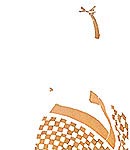
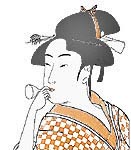
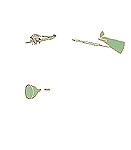
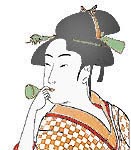
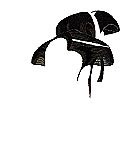
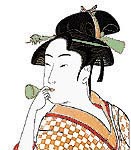
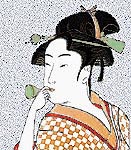
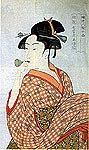
Printing a Color Woodblock PrintThe illustrations below demonstrate the successive application of inked woodblocks upon a single sheet of Japanese mulberry paper (kôzo) to produce a completed nishiki-e ("brocade print"), a copy based on an original design by Kitagawa Utamaro. For this demonstration I have used only a detail of the full image and have eliminated overprinted color patterns. The keyblock and color blocks (nos. 1, 2, 4, 6, and 8) are made by cutting and chiseling away all the wood that will not be inked with the desired color (represented here by the white areas), thus leaving the remaining wood in relief and ready to take the inks. Printers often used special printing effects such as burnishing, embossing, or the application of metallic or mineral powders through stencils. In step 10 below, a stencil was used to cover the form of the woman, glue was brushed on the background area of the paper (the area left uncovered by the cutouts in the stencil), and then powdered mica was applied, either blown or sifted through a fine silk netting. Once the glue had dried, excess mica that had not adhered to the paper was brushed off. Step 8 illustrates a duplicate application of the same pigment (the black of the woman's hair) to achieve a fully saturated color area. Thus a print made with 10 different colorants might require 15 or 20 printings in order to produce fully saturated color areas. [For a related process by a modern printmaker, see Binnie.] For more about this design by Utamaro, see Utamaro and the Physiognomists.
Back to discussion on Carving the blocks or to FAQ's |


Viewing Japanese Prints |